In this tutorial, I'll show you how you can create and deploy an NFT contract —without needing to touch a single line of Solidity code or JavaScript—using the OpenZeppelin Contracts Wizard. You'll be able to manage your token via a multisig, using OpenZeppelin Defender to mint tokens and to pause the contract's functionality in the event of an emergency.
By the end of this tutorial, you'll have your own deployed NFT contract. More importantly, you'll also have some valuable experience with important concepts in secure contract deployment and administration.
Create Three Accounts
For a three-account multisig, you will need to have three separate accounts. It's easy to create a new account in Metamask by clicking your account image then selecting Create Account. Once you have done this three times, you're ready to proceed.
Get Testnet ETH
Once you have obtained your ETH from a faucet, you're ready for the next step.
I've assembled a list of Rinkeby faucets here.
Create a Gnosis Safe with Defender Admin
OpenZeppelin Defender is a security operations (SecOps) platform for Ethereum development. In this tutorial, you will use it to manage your multisig account and to run admin functions on your deployed contract.
Head over to defender.openzeppelin.com. If you don't have an account already, you'll need to sign up.
- Once signed in, you'll see a few options on the left nav. Select Admin --> Add Contract --> Create Gnosis Safe.
- In Metamask, select the Rinkeby network.
- Click Connect Wallet and select an account that holds the testnet ETH that you obtained from the faucet.
- Give your multisig whatever name you'd like and select the Rinkeby network.
- Under Owners, you'll need to add the address of each of your three Metamask accounts. To do this, you select an account in Metamask, copy the address, paste it into Defender, and then select Add Owner. Repeat this step for each Metamask account.
- Set your Threshold to 2.
- Click Create Gnosis Safe.
- Each account connected to Defender will need to confirm the transaction.
When you see the “Transaction Confirmed” message, you can click Go to Safe to see the details of your multisig. Later in this tutorial, you will transfer ownership of your NFT contract to this account.

Consult the Wizard
The OpenZeppelin Contracts Wizard allows you to jump-start development by giving you pre-built Solidity code from the latest release of secure OpenZeppelin contracts based on the selections you make. You can take this code and export it to Remix or download it for working locally.
Go to wizard.openzeppelin.com to proceed.
Select ERC721.
Under Settings, give your token whatever Name and Symbol you would like.
You can ignore Base URI for the time being, since you won’t be using your token to point to any metadata in this tutorial.
Under Features, select Mintable, so that you can create new tokens by calling a mint function.
Select access control and Ownable.

Select Auto Increment Ids so that each time a token is successfully minted, the contract keeps track of the number of total tokens minted.
Select Pausable.
You’ll notice there's a space for a Security Contact. It is a good idea to include this now, since you won’t be able to edit your contract once it’s deployed. In the event that you want to add any monitoring or alerting service later, this allows your contract to be registered with that service once your code is verified.

Import to Remix
When you’re ready, simply click Open in Remix, and everything will be imported into Remix. Remix is a bonafide Solidity IDE, so once your code is imported here, you could add to it or change things around. However, since the Wizard left everything in good shape, don’t change anything.
Compile
Compiling your code makes it possible to deploy it to the blockchain.
On the left, ensure that the compiler either matches the version of Solidity specified by your pragma or is a more recent version and click Compile contract-{someAlphanumeric}.sol.

Deploy
Deploying our code sends a transaction to write it to the blockchain.
From Remix’s toolbar, select Deploy & Run Transactions.
Under Environment, select Injected Web3. Doing so will cause Metamask to connect to the site.
Once connected, you will see your account's public key displayed under Account.

Under Contract, click the dropdown. At the very bottom, you’ll see your ERC721 token contract.

You’ll notice that Ownable shows at the top of the list, but we want to deploy our token, not just Ownable, so be sure to select your token contract. When you deploy it, all the imports and dependencies will get deployed in the same transaction.

Selecting Deploy will prompt you to confirm the transaction in Metamask and pay for gas.
At the bottom of the screen, Remix lets you know that the transaction is being mined and when it gets confirmed. It includes details of which block, the address deployed from, etc. You can select view on etherscan to see all the details of that specific transaction.

In Etherscan, the From address shows the address you just used to deploy the contract. Selecting that address will show you any previous transactions made by that address, indexed by Etherscan.
The To address is the address of the deployed contract.
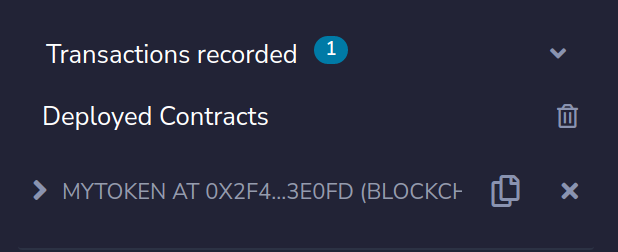
You can also view the contract by going back to Remix, clicking the button to copy the address where it says Deployed Contracts, and entering that in the search box in Rinkeby Etherscan.
Contract Verification
Defender is able to administer contract functionality for contracts with verified source code.
To do this in Remix, you’ll need to first add the Etherscan Contract Verification plugin by clicking the plug at the bottom left. Search for Etherscan and install it. Once it’s installed, select the Etherscan Contract Verification plugin from the left navigation bar.
You need an Etherscan API key, which you can get by going to etherscan.io and creating an account. Once logged in, you'll see in the dropdown under your user ID a listing for API KEYS.
Once you have your API key created and copied, return to Remix and paste it in, then select your token contract from the dropdown. (You don't need to include any constructor arguments.) Paste the address of the deployed contract. You can find this in Etherscan in the To: field from the transaction earlier. You can also find it in Remix in the Deploy section under Deployed Contracts.

Interacting with Your Verified Contract on Etherscan
Return to Etherscan and select Contract. You will see the complete source code of your contract along with all of the imported contracts.
We haven’t yet minted any tokens. Let’s turn back to Defender for that part.
Importing the Contract into Defender
Head back to Defender and select Admin. You’ll see the multisig created earlier. We will make use of that in a bit.
Select Add Contract → Import a New Contract from the top right-hand corner.
You can name it anything. For simplicity’s sake, it’s a good idea to give it the same name as the deployed contract.
Select Rinkeby and paste in the deployed contract address. Remember: You can find the contract address via Etherscan as the To: field of your wallet’s most recent transaction or in Remix under Deployed Contracts.

Because the contract has been verified, Defender loads the ABI automatically, and it detects that your contract is Pausable, which means you can use Defender to pause our contract if you want.
Click Add.
Transferring Ownership to the Multisig
Right now, your NFT contract has the wallet address you used to deploy it set as its current owner.
Multisig ownership is more secure, so we will transfer ownership to the multisig created earlier. To do this, select New Proposal then Admin Action.

Here, on the right side of the screen, you can see the current state of the contract. It's not paused, the owner is your wallet address, and the totalSupply is zero since we haven't minted any tokens.
Click the Function dropdown and select transferOwnership. Under newOwner, select the name you gave the multisig.
Below this, you'll see Execution Strategy. We aren’t using a timelock or a governor, so our execution strategy is rather straightforward.
Select EOA for externally owned accounts. Ensure that the same wallet used to deploy the contract is currently connected to Defender and set to be on the Rinkeby network. Since this account owns the contract, we have the ability to run this onlyOwner function. After transferring ownership, only the multisig can run such functions.
Under the proposal title, give a friendly description to make it clear what you intend to accomplish here. "Transfer ownership to multisig" would suffice.

Select Create admin action and you will see that this transaction (with the friendly title you just supplied) is pending approval.
Select Approve and Execute. You'll have to sign (and pay for) the transaction in Metamask and then it gets executed.
Mint a Token
To mint a token using Defender, you’ll run another Admin action.
Select Admin → {Your NFT Contract}.
Under Proposals, you’ll see the transfer ownership transaction just executed.
Select New Proposal → Admin action.
Under Function, select safeMint. You’ll mint a token to the contract’s previous owner to say thanks for deploying the contract.
For execution strategy, select Multisig along with the multisig managed by Defender that is the current owner.
Defender shows us that your multisig has three addresses and that you need at least two to approve the transaction for it to go through.
Describe the proposal as your first mint and select Create admin action.

On the next screen, review the admin action and select Approve.
To actually make this multisig transaction happen, you’ll need to sign the transaction with two of the three accounts belonging to the multisig.
In Metamask, switch to an account in the multisig, select Approve, sign, switch to the second account, sign, then select Approve and Execute. (Once the transaction has been signed by two, it can be executed by anyone, including the account that just signed.)
You have successfully minted your first token. To see this on the blockchain, select the contract’s address and paste it in Rinkeby Etherscan (or simply hover over the contract address and select View in Block Explorer) .
In Transactions, note the transfer of ownership.

In Internal Txns, you’ll see the mint transaction. Selecting the parent transaction takes you to the transaction details, where you can see that Tokens Transferred was the token ID zero to the same address that deployed the contract.

Congratulations! You have successfully deployed an ERC721 contract, transferred ownership to a multisig, and minted a token to an externally-owned account. From here, feel free to experiment further with Defender. See what happens if you pause your function and try to mint another token.